Motion Design - “Stay With Me” 3
This is part 3 of my ongoing blog series for the “Stay with Me” motion design project. This week focused on rigging and animation, with some time for UV management and texturing towards the end. Let’s dive in!
Umbrella Rig
For the umbrella I knew I wanted to have it animate so that the people holding them could make them collapse in rhythm with the music. This required a study of how the mechanism of an umbrella actually works. If you look closely, there’s a moment when the ring has been pushed to the top where the ribs (the supporting metal rods) are at their maximum length before bending to create the iconic shape. I wanted the umbrella to reach that maximum length moment right on the beat and then settle into the bend retraction. In order to get this whole motion to flow correctly, it was going to take a tedious amount of setting up with joint chains and set driven keys in Maya.
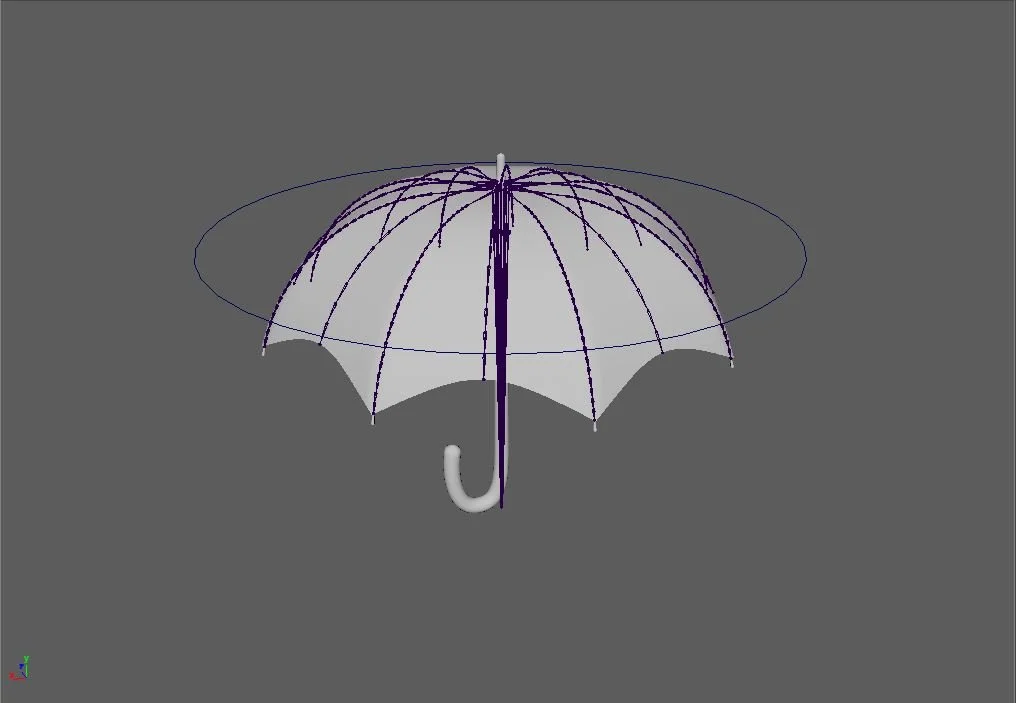
Maya umbrella rig with X-ray joints. Each canopy section gets a chain, as well as each major rib.
It is not often that I come across rigs that require radial symmetry, and unless I start an octopus project anytime soon, taking the time to make tools to speed this process up was not really an option. Even just skin weighting 4 of the 8 sections of the canopy to use Maya’s built in planar symmetry tool took a lot of work and iteration. The transitions between values on the canopy itself had to be a perfect gradient so that the idea that the mesh was a loose fabric would be convincing. I considered trying to explore some cloth simulation options, but I am a little shaky on the pipeline into game engines (Alembic caching?). I also thought I wouldn’t get the same snappiness as I would from hand keying the SDK.
Since the bend of the joints is more nuanced than simple rotation matrices, I needed to add a set driven key to adjust the rotation and translation so that the joint chains would be perfectly straight by the time they collapsed on the handle. Here I did create a custom tool, making it so once one joint chain had its SDK established, those same nodes could be connected to the other chains.
Here’s the results:
SDK animation top view.
SDK animation bottom view.
I did the animation of the retraction in Maya and brought it into UE as an animation sequence. That plays for the length of the shot and then the person and their hands are animated to match the animation sequence. Here is an isolated example:
Full animation in UE5.
The components of the person actor are animated just like moving around paper cutouts. These were keyed to the audio in the UE Sequencer.
Main Building Texturing
Towards the end of the week I was able to get some of the texturing done. I focused mostly on the main building, where I needed to make sure it matched the color palette, and the neon effect was convincing. Luckily, because the spirit of the design specifications is to stick with blocky colors, a lot of things like the fruit or mortar of the building could be simplified to just base color fills in Substance Painter. I still wanted to add a little bit of variety, and that would be done by introducing some pattern work.

Base textures in Substance Painter.
For the neon lights, it took some fiddling around with parameters and shading models to make sure the on and off states balanced with the post-processing volume in the scene. When the lights are on, its essentially an overloaded emissive channel to create a bloom effect. When they’re off, I’m using the translucent shading model to give an appearance of hollow glass. I needed a post process volume to turn off automatic exposure correction. When lights are turned on or off, Unreal by default does a gradual level adjustment, like if you were to go from a dark room to daylight. This was ruining the quality of my shadows when the light switched states, so I disabled it in the volume.
Neon sign animation done with material parameter keys in the Sequencer.
I have a few final steps to accomplish before the deadline. I want to add variety to the patterns of the umbrella using Substance Designer to generate various textures. I need to create many instances of the umbrella person and make sure their animation is synced to the music. Then I will be fiddling around with Unreal Engine lighting, and doing any post-process adjustments in After Effects with the time I have left.
Stay tuned!