Character - The Shrew
This will a lengthy post going over my full character pipeline and the development of my shrew character (effectively two characters). My main goal with this project was to cement the workflow that works for me when it comes to independent projects, automating where I could, and resulting in something that felt true to my original concept. After going through this project, I feel much more comfortable with my speed and understanding of creating 3D animatable characters for games.


Concept and Planning
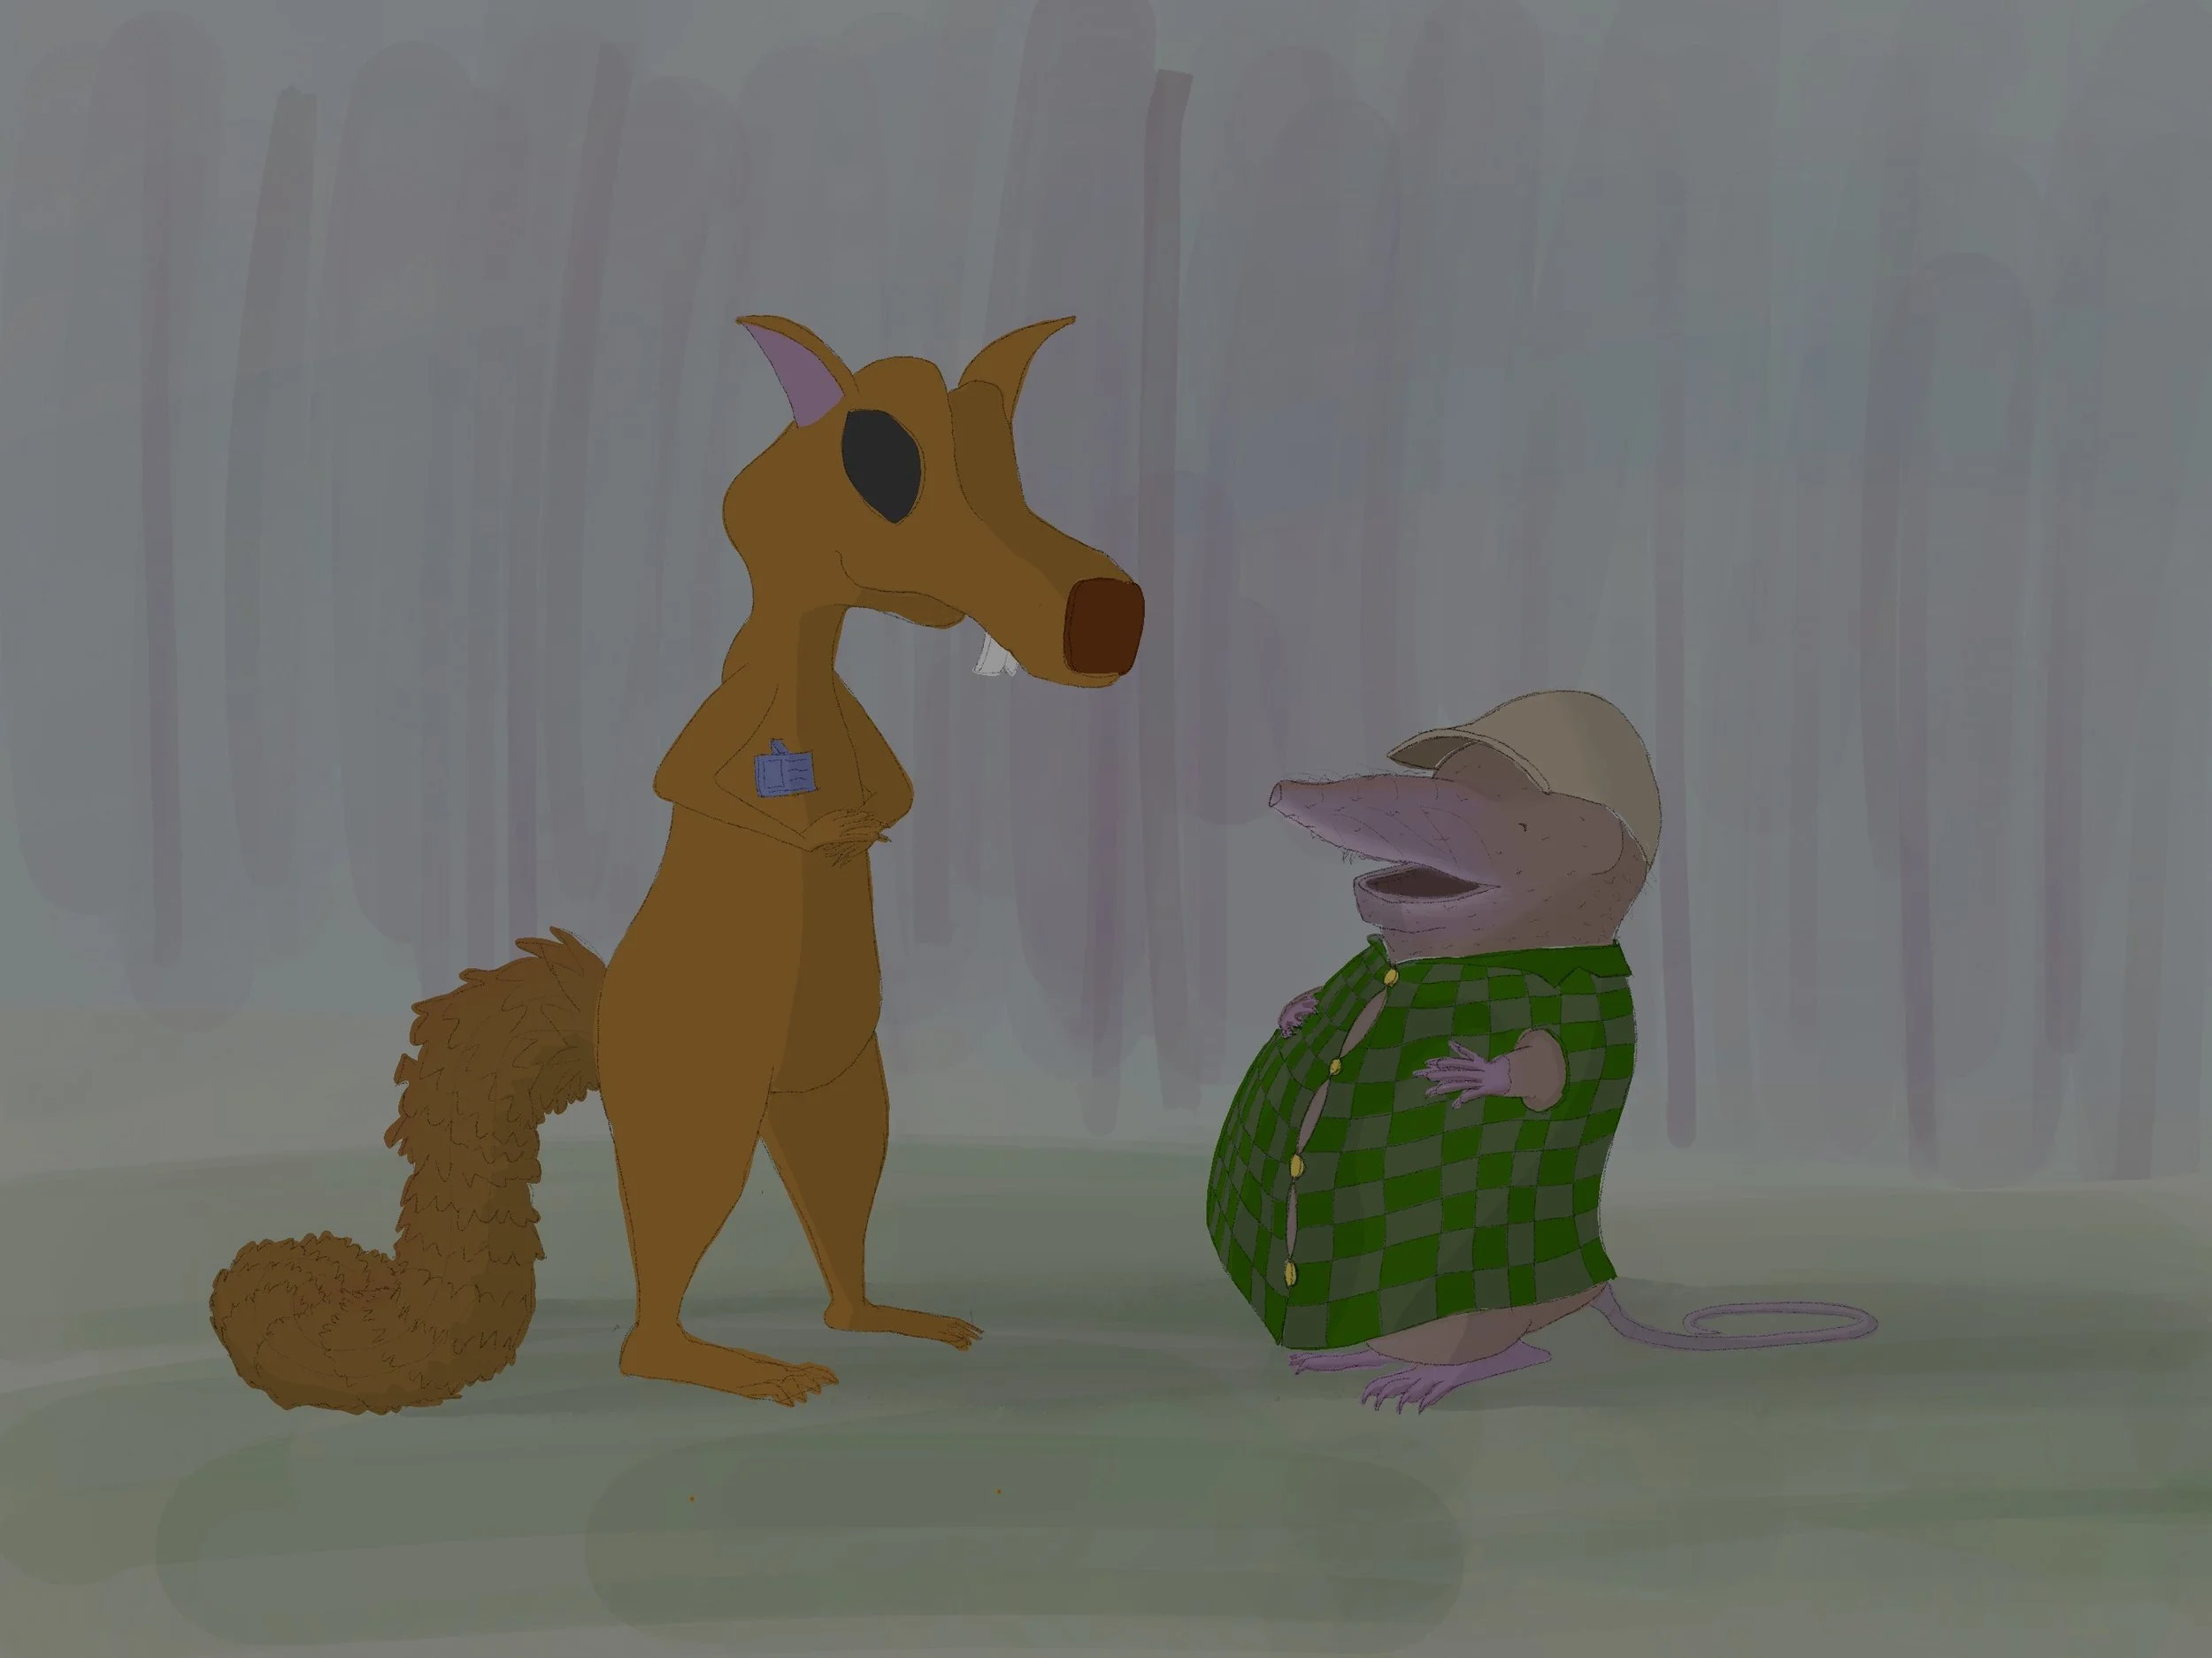
Whenever I’m working on a new piece, I find it very important to develop the potential story and scenario concept that would exist around this character in a full completed game. What I landed on was inspired by the survival horror genre. A few years ago I created a squirrel character that lived with other creatures in a small forest village. They would be hit by a never-ending winter, and since the squirrel was more prepared, he doesn’t venture out into the cold wasteland until much later than all the other animals. This shrew is one of the animals that served as a friend/companion character in the pre-winter sequence, and then as a stalker/enemy during the winter levels. Internally named “Fall Shrew” and “Winter Shrew,” I needed the first to be unassuming and appealing in design, while the second needed to be off-putting and clearly an enemy to the player.

Early shrew anatomy and contour exploration
Look and feel concept art for squirrel and Fall shrew relationship
At this point it was time to do some extensive research on the animal and its anatomy. I landed on a Shrew because they perfectly fit what I was looking for. While appearing cute and small, they are actually vicious hunters, with a poisonous bite, and territorial behavior. I was thinking it would be interesting to make the friendly shrew design reflect the general public’s thoughts about what a shrew is, and then the enemy would reflect a shrew’s actual behavioral traits. I was particularly drawn to how different the characterization of the animal feels when its mouth is closed vs. open. The way the teeth flare, as well as the natural red coloration from reinforcing iron deposits would make the winter shrew much more menacing.


The next issue I quickly encountered was a size difference between the squirrel and the shrew. If the shrew were to stay the same height between both forms, it would be about half the size of the squirrel, which would make for a terrible stalker enemy, and also hard to track for the player. By looking into the anatomy, I had an idea concerning the hind legs. All rodents, and many other quadrupeds, have their back legs folded up and hidden within the fat and muscles of the lower torso. When rodents stand on their hind legs, it is not common to see them fully extend their legs like a human would. However, in the context of the game, this would add a lot of height to the shrew, and with fully extended limbs like a human, it would start to border on the uncanny valley, which would be perfect for unsettling the player.
Now that I knew I was going in a direction of “realistic exaggeration,” I wanted to push and the design of the Winter shrew this same way in other areas. If the shrew had been out in the winter cold for longer than expected, they would become malnourished and frostbitten. Sparing the details of the references gathered here, I thought making the skeleton of the shrew as visible as possible on the surface would show the lack of available food, as well as allow the legs to be fully mobile with the elimination of fat and muscle mass. Often seen in the designs of games like Resident Evil or Silent Hill, exposing muscle and bone aids in creating the sense of discomfort in an enemy character, and in my case fits into the story scenario of being trapped in the cold.
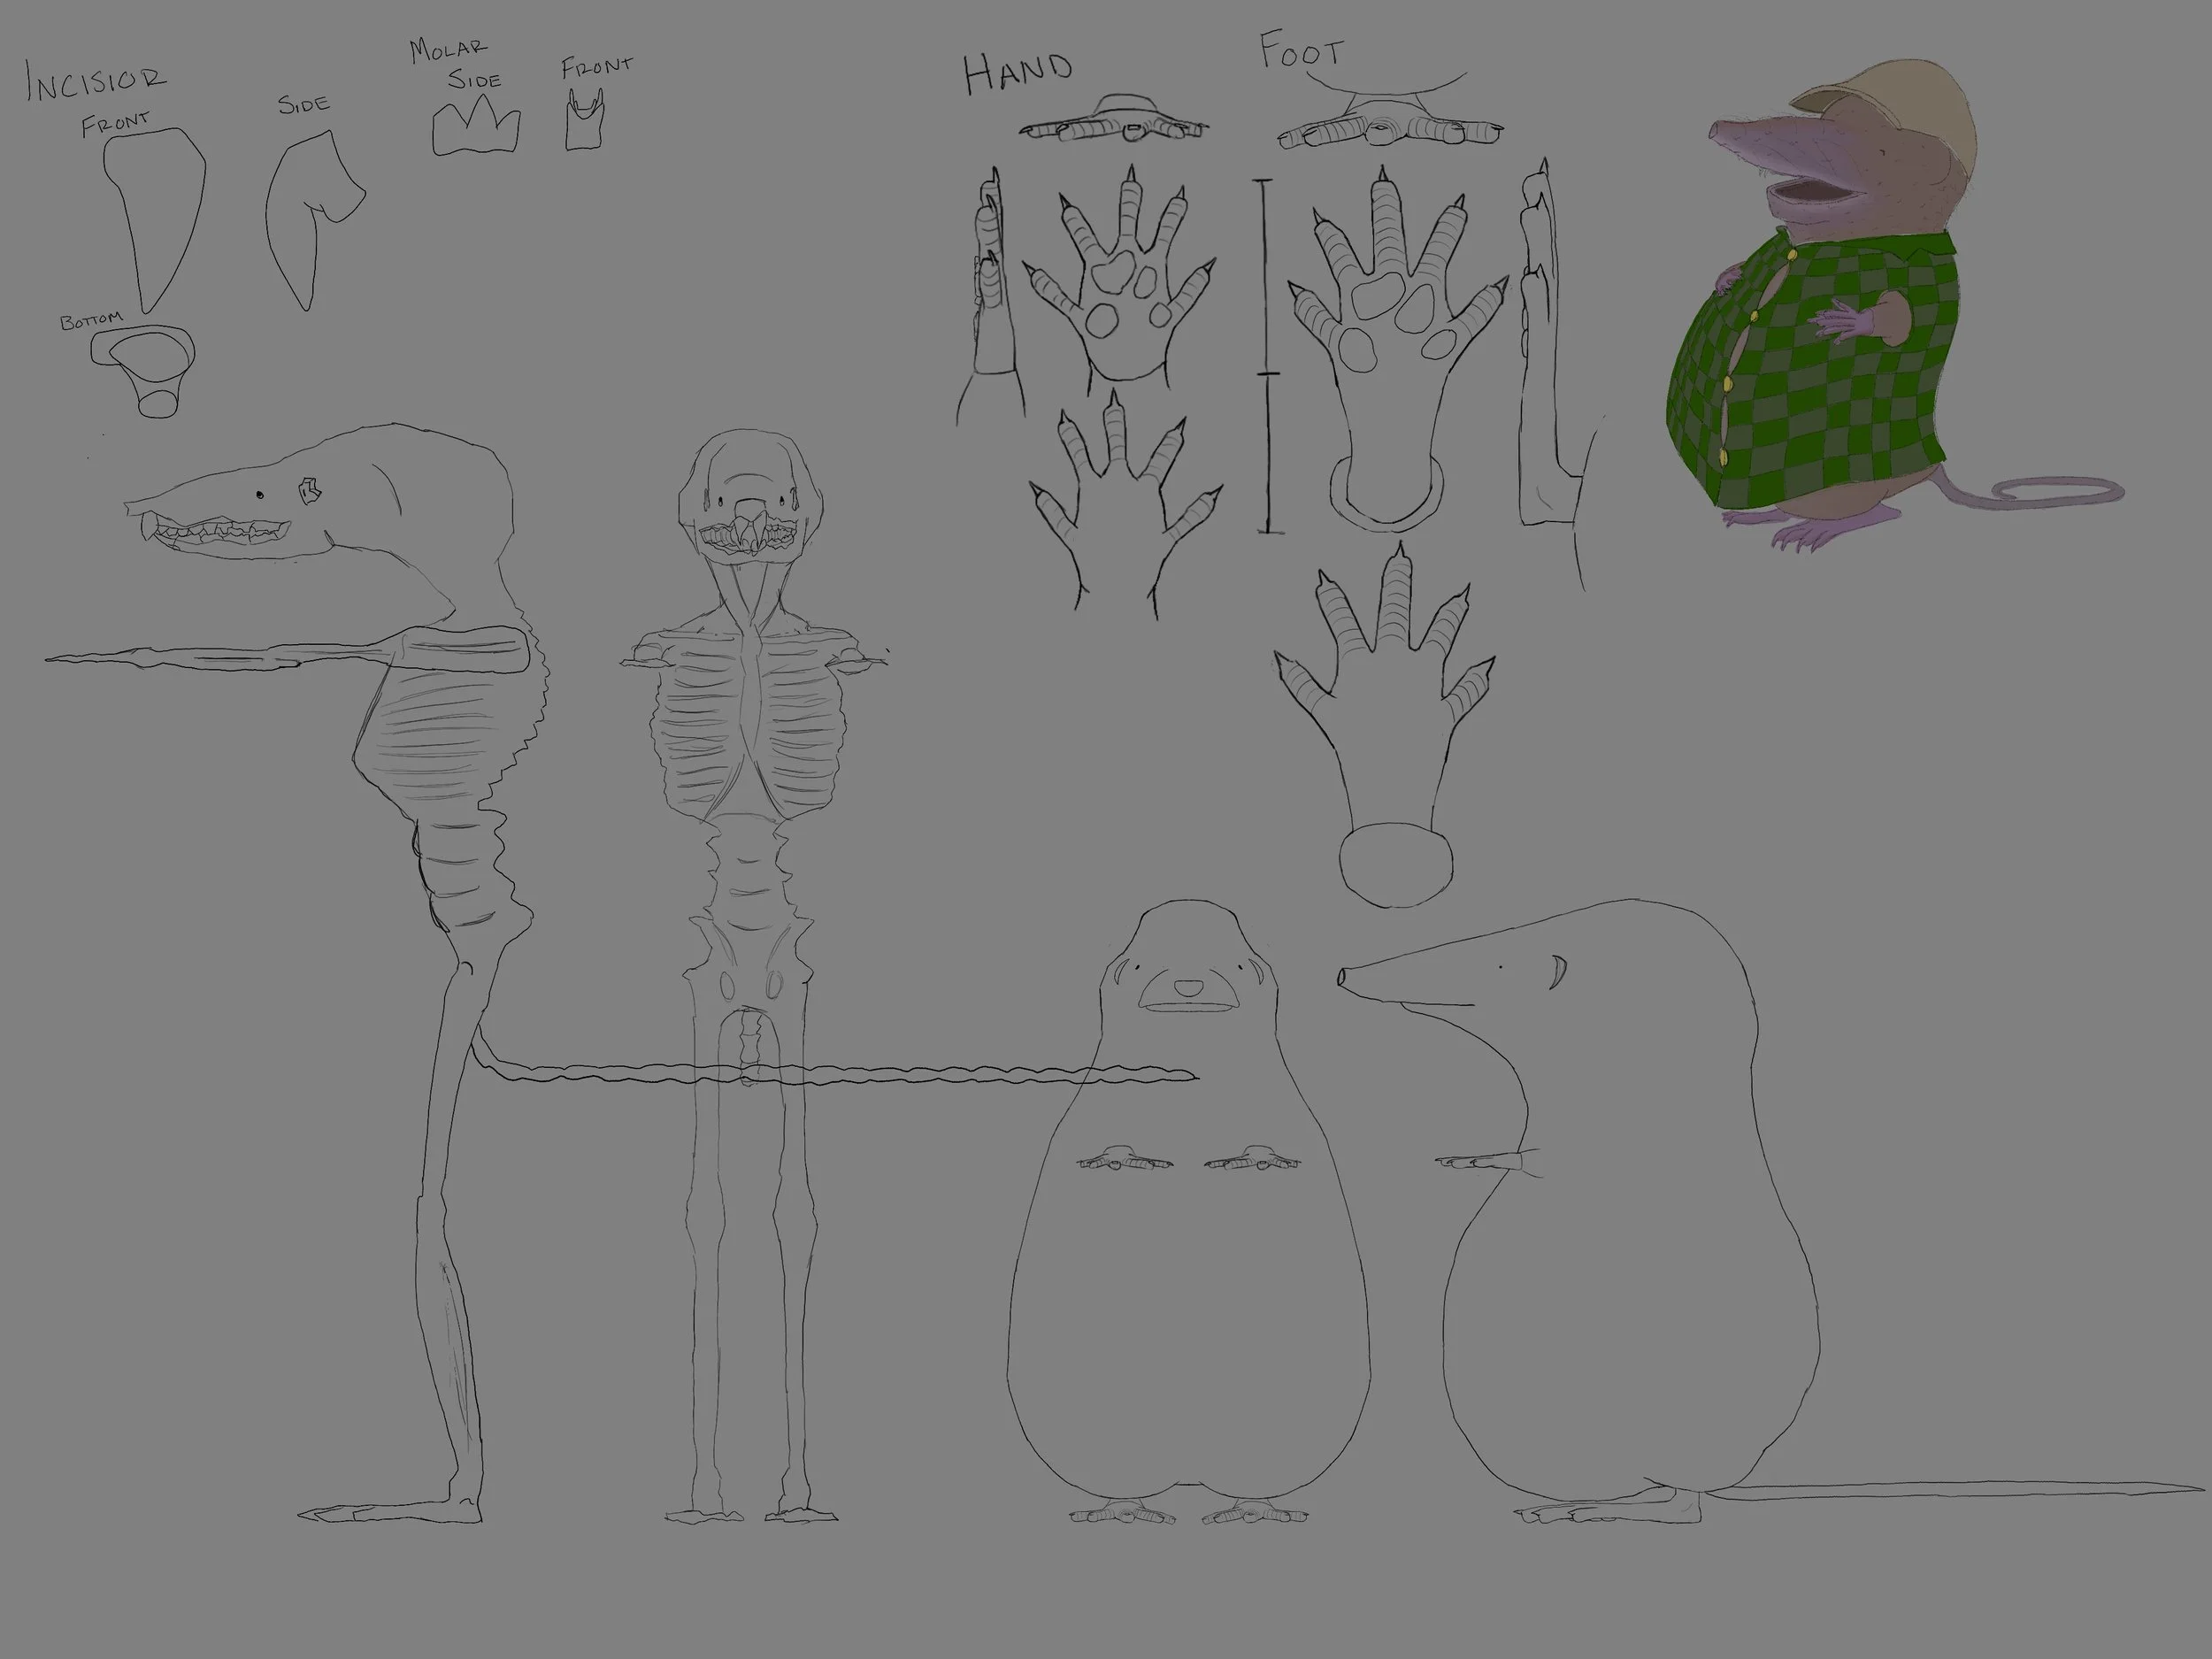
Superimposed orthographics used for sculpting
Although a lengthy process, I determined that actually modeling the skeleton and then modeling the outside skin of the shrew on top of it would make the proportions better, and make it easier to get ideas of where it could be interesting to emphasize the bone structure. I could also repose this skeleton for use in the regular shrew to make sure that the change in height was actually accurate between the two.
For the Fall shrew, my design was going to be pretty faithful to the real-world appearance of the animal. Since my squirrel character has a winter coat, I wanted to continue this theme of simple dress in my character designs, so the world felt cohesive. I eventually landed on giving him a vest and a flat cap, sort of referencing the simple country style of England, where this Family of shrew, Soricidae, can be found. Although a shrew in its normal appearance isn’t overweight, I wanted that to be part of its character in the pre-Winter times, where the Shrew’s gluttony is his downfall when there’s no food to go around. That informed the decision to make the vest popping at the seams, as well as skin tight (also saving the need for cloth simulation)! With some orthographics drawn and strong identities for both characters, it was time for modeling!
Modeling
When it comes to characters I always start with a simple box model based off the concept art, and a simple rig to test proportions and general feel in 3D space. In this case I would be comparing and adjusting between the squirrel and both forms of the shrew. Even with accurate consideration of the legs fully extended, it just wasn’t enough to feel daunting next to the squirrel. I continued to push the length of the legs as far as would be reasonable, eventually getting to something closer to the leg-torso ratio of a human.
With these I was able to make adjustments to the characters, as well as have an exportable base to start sculpting in ZBrush.


A few weeks before this project started I had actually been doing some daily sculpts of human skulls in order to better my understanding of bony landmarks, and eventually muscles for facial expressions and FACS. As a result, I had a pretty good workflow when it came to sculpting bones and managing subtools. Although time-consuming and not practical for every project, I feel that taking the time to sculpt the skeleton properly did wonders for the accuracy and design, especially of the winter shrew. Although less helpful for the Fall shrew, having the underlying skull made it so I could be sure the teeth shape and structure was identical between the two, which was important for believing these were the same character. Because of this effort, I went all out in showing the skeletal landmarks on the final body. In many areas, like the ribcage, spine, and pelvis, there is basically a very thin layer of skin hiding the structures underneath. Some spots like the end of the mandible or the vertebrae I wanted to have exposed in the final design, to show that because so little of the protective layer of fat remains, the bones have broken out.

Now taking the models into Maya, the retopology was fairly straightforward. For the shrew, the body is just planned out as an enlongated sphere, and the head follows the natural edgeloops needed for facial rigging. I did some hard surface modeling in Maya to create the vest and buttons, the hat, and add some whiskers with simple XGen hair cards. In the end, this model has a tri count of 32428. The Winter Shrew was going to be more expensive by nature of how many more surface details there were. For the ribcage for instance, I weighed the option of handing the stair stepping of the ribs through shader techniques and normal mapping, but I decided that having the striations visible on the silhouette was just too important to the design. In a scene where there are many characters on screen, perhaps an LOD could be created to pair down the density of quads in the torso. For the bone that is visible on the surface, I made these much simpler in their quad count since they would be rigidly skinned to their associated body part, and did not need to deform on their own. In the end, the winter shrew has a tri count of 47556, which I have found reasonable for an important boss enemy.
UV/Texturing
Texturing these two really pushed my understanding of what is possible in Substance Painter. I did not intend to do anything fancy with the Shader in Unreal Engine, so the maps authored and exported from Painter would be exactly the appearance I would be getting in UE.
First, the Fall shrew. One question I had been wrestling with was what would be the best approach to doing the hair of the shrews body. I did a lot of investigating and researching on this topic. Should I do hair cards with XGen? Maybe try a fin and shell technique? Ultimately, a Shrew’s hair doesn’t stick that far off of its body, so maybe I could just handle it with the normal map. And maybe XGen wouldn’t be so useless…

XGen hair panel from a side angle

Hair panel render to be used as the brush alpha map
I had used XGen to develop the whiskers of the shrew, and in cases like those, I have found a lot of success with it. In a situation where I want hair on the entire body, managing this for performance and getting into Unreal Engine isn’t all that well documented, and I thought extending the silhouette of the shrew just for realistic hair would be both hindering to animation and too different from the style I had in mind. But another cool thing I like XGen for is getting a large amount of random primitives to morph into patterns. With these patterns you can render out an alpha map to use for a brush in Substance Painter. The final result works fairly well, breaking up the base color of the body enough to give visual interest.

As for the Winter shrew, I had to become much more comfortable and familiar with smart materials and generators in order to get a workflow for the look I was going for. I initially started with the body like I would with a human character’s skin. Taking a base color, in this case inspired by the blue-ish grey of a naked mole rat, I then start to layer on numerous extra base colors with random noise, complementary reds, low opacity yellows, just to add some organic shifts in temperature around the body. Then, for areas where the bone was exposed, I added a noisy height effect on the perimeter to give the appearance of peeling back of the skin in these areas. Because those holes also exist on the UVs of the body, I could use the UV distance generator to make rings around these areas to simulate a raw wounded look. In some areas without the holes, this same effect could be warped so that striations appeared to make the skin look damaged. On the bottom of the tail, for example, this gives the effect that the bottom has become sensitive from constantly running against the cold ground. The bone is built up of some normal map noising to give them a deteriorating look. For the muscle that’s left on the bone, I created a special material that builds up as you paint it. At 0, just the bone will show in the area, and at 1, the muscle will be exposed and discolored. anything else will be somewhere in between, and this allows me have manual control over the look in each area. A slight modification of this technique was reused for frostbite on the extremities.

And with that, the textures were ready!
Rigging/Scripting
Although both effectively biped style rigs, I intended to animate the two very differently. The limbs of the Fall shrew were their own separate meshes, so they would be animated in a way to make them look like they were sliding on the body. The Fall shrew is pretty immobile, as shown in the walk cycle I made for him, so the rigging is fairly straight forward. I used my autorigging scripts for this, with the arms and legs being translatable around the body, with set driven keys helping them stay coplanar to the body.

Winter shrew control rig
The Winter shrew however, is much more interesting. Because so much of the bone is visible, it doesn’t take much planning to see exactly where the joints should be around the body. The downside of that, is that many things that can be cheated on a regular human are not so hidden here. Like the clavicle and scapula, with them being so exposed, I couldn’t just do a normal joint chain with weight painting without some helper joints and set driven keys. I wanted to make it so that if the animator rotated the clavicle, the scapula would translate and rotate in the complex way that a scapula actually moves when viewed on the skeletal level.

Blue shows scapula SDK helper system, red has it turned off
The other unique thing on this rig that my autorigging tools didn’t cover was an expansion of my reverse foot system for IK foot peeling. The feet are fully exposed all the way to the metatarsals, making the toes much longer than a normal human rig. Having just the normal heel roll wasn’t enough for a walk cycle. For ease of animation, I wanted to add extra peel controls further down the foot

Three levels of IK foot roll
Doing some poses with these rigs and skin weights proved to be satisfactory, so it was time to animate some cycles to illustrate their personalities.
Animation
To cap off this project and make them presentable in Unreal Engine, I wanted to do a walk cycle for each character. For the Fall shrew, I went for more of a wobble. This was an attempt to make the shrew look helpless, and unassuming.

The Winter shrew cycle is much more threatening and true to his ferociousness!

I have authored a couple tools to help with game cycles like these. The first is a checker and modifier to the final frame of the loop to make sure it interpolates correctly to the settings of the first frame of the loop. It can be tedious to have to make sure their is no hitch on the final frame of a walk cycle, especially if you want to go back and tweak it later. My other tool mirrors the animation for perfect loops like these. In a 24 frame cycle, the position of the left foot of frame 1 can be applied to the position of the right foot at frame 13. This is possible due to certain tags I assign to nodes on rigs created with my auto rigging toolset.
Takeaways
I had a lot of fun with this project, and really expanded by Character Artist abilities. I was careful to always consider the player’s experience and perception of these assets, and how that should inform the design and final product. By running another character through my tools, I was able to refine them, and hopefully speed up my workflow in projects to come!